Launchpad Tutorial with Ableton Live 10 Lite - Part Five
Creating an EDM Song
In Part Five we'll create a basic EDM song from scratch in order to learn some more features of Ableton.
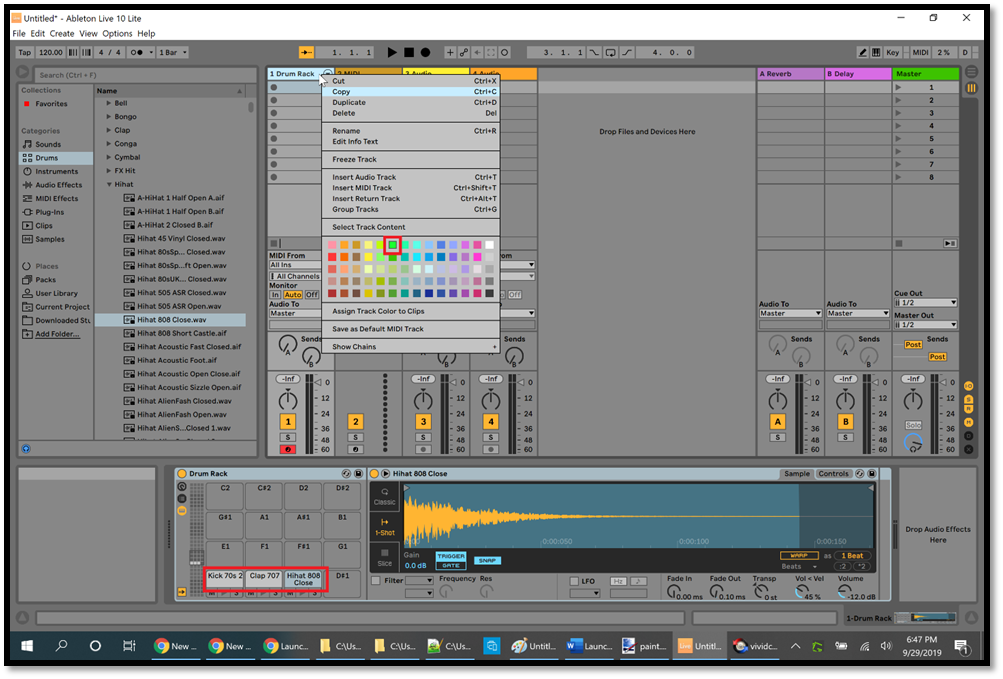
First we'll add a Drum Rack to our first MIDI track so that we can create some drum beats, just as we did in Part One. Click Drums on the left in the Ableton Browser, then drag Drum Rack onto the title bar of the first MIDI track. Expand Drum Hits, then expand Kick, then drag "Kick 70s 2" onto the square labeled C1 in the Drum Rack at the bottom of the screen. Now expand Clap and drag "Clap 707" to the square next to the kick drum in the Drum Rack. Then expand Hihat and drag "Hihat 808 Close" next to "Clap 707" in the Drum Rack. Right-click the title bar of the first track and select green:
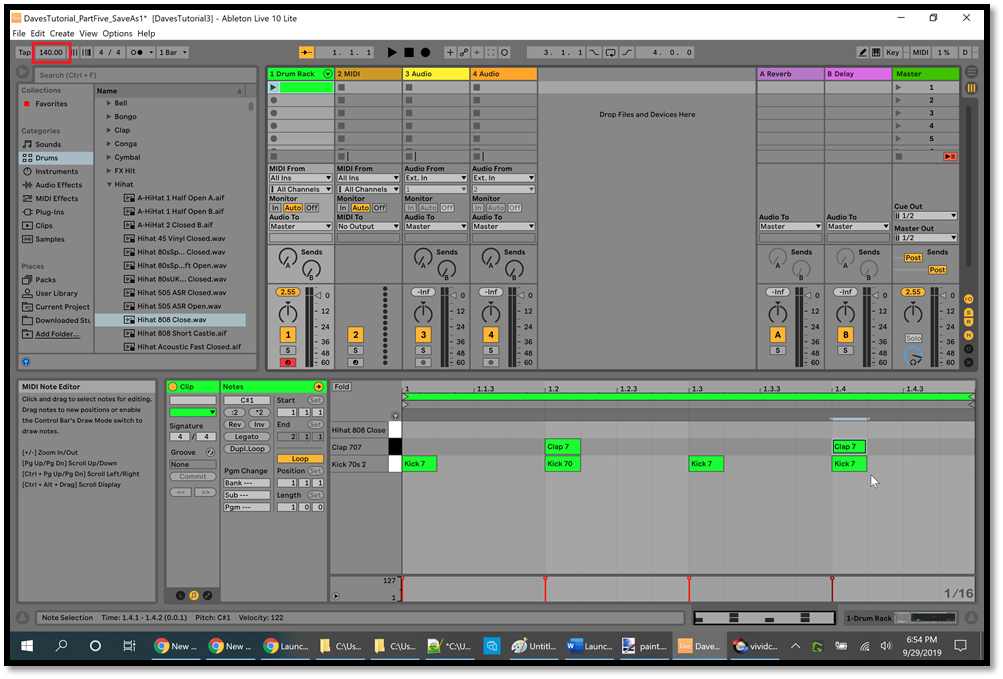
Double-click the first clip slot in track #1 and add the kick and clap icons as in the picture below. Change the BPM to 140 (highlighted with a red rectangle at the top left in the picture below), then launch the first clip in track #1:
Stop the clip, then click Instruments in the Ableton Browser, then expand Instrument Rack, then expand Bass, then drag "Analog Saw Bass" onto the title bar of track #2. Right-click the title bar for track #2 and make it yellow (the first yellow in the top row of colors). Double-click the first clip slot in track #2, press Shift+Tab to see the Device view, then click and drag the Volume to turn it up to its maximum level (6.0dB). Press Shift+Tab to return to the Note Editor and add the icons as in the picture below. Click the first Scene Launch button in the Master track (highlighted with a red rectangle at the top right in the picture below) to hear the beat:

Stop the clips. Right-click the first clip in track #1 and click Duplicate, then do the same for the first clip in track #2. Right-click the title bar of track #3 and change the color to the one highlighted with a red rectangle in the picture below:

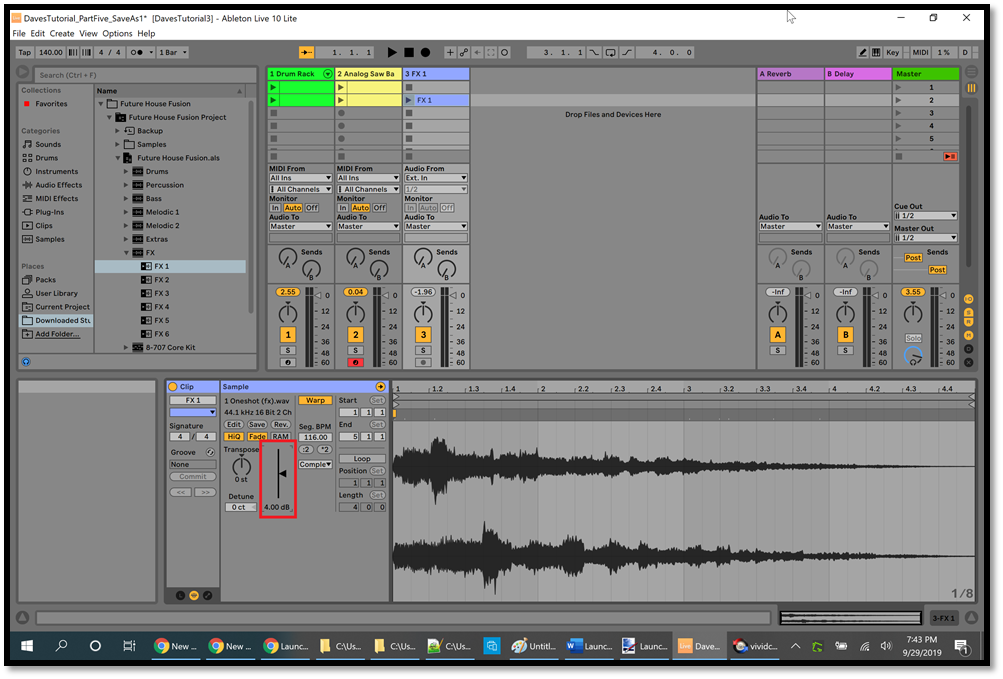
In the Ableton Browser, click the folder for the packs that you downloaded and installed in Part Two, then expand Future House Fusion, then expand Future House Fusion Project, then expand Future House Fusion, then expand FX (as in the picture below), then drag "FX 1" into the second clip slot in track #3. Right-click the title bar of track #3 again and click "Assign Track Color to Clips" (highlighted with a red rectangle in the picture above). Right-click the title bar of track #4 and click Delete. Click the clip in track #3 to highlight it, then increase the volume to 4.00 dB (highlighted with a red rectangle in the picture below):
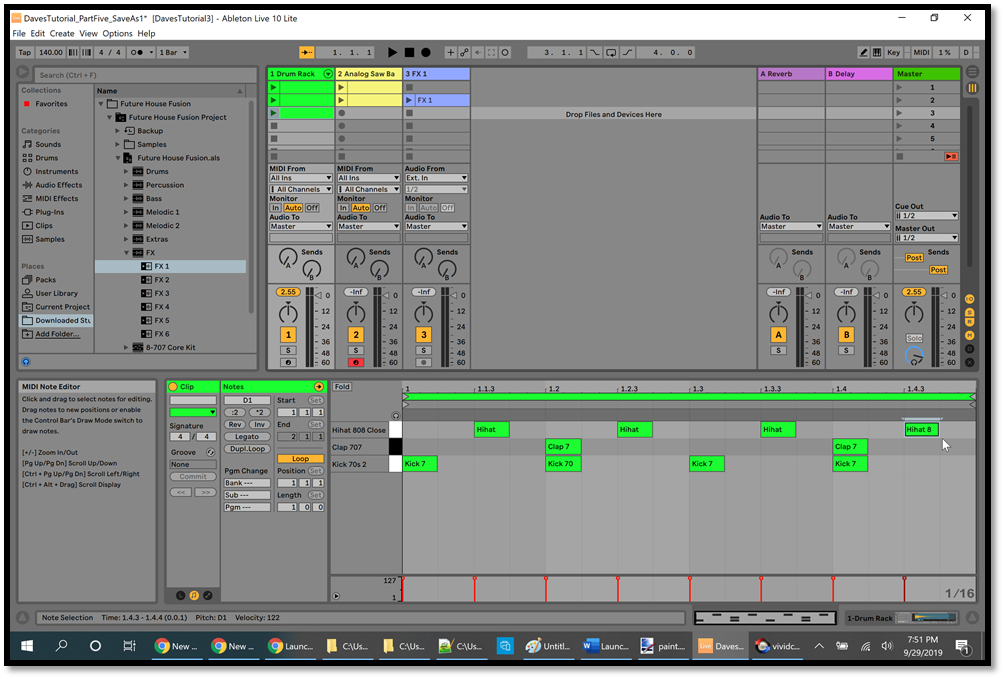
Right-click the second clip in track #1 and click Duplicate, then add the Hihat icons as in the picture below:
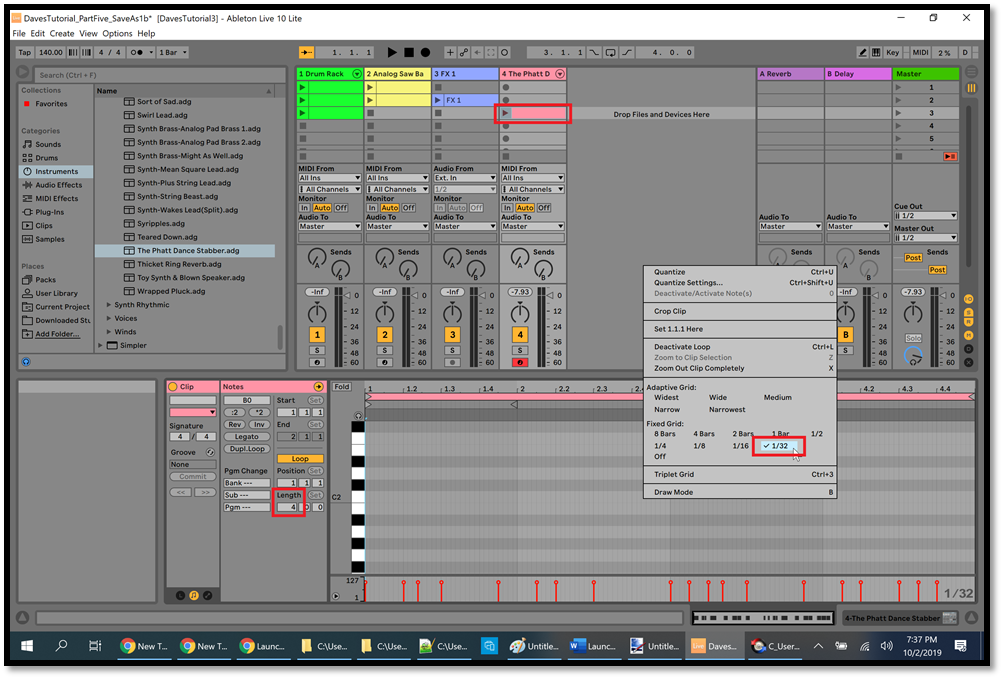
To add some melody to our song, click Instruments on the left side of the Ableton Browser, then expand Instrument Rack, then expand Synth Lead, then scroll down to the bottom and drag "The Phatt Dance Stabber" to the right of track #3 (where the title bar for track #4 would be). Now you have a fourth track. Right-click the title bar for track #4 and click the top left color (a pinkish color). Double-click the third clip slot in track #4 and change the Length to 4 (highlighted with a red rectangle in the picture below), then press Enter. Right-click in the Note Editor and change the Fixed Grid to 1/32 to give us more control over the width of our notes:
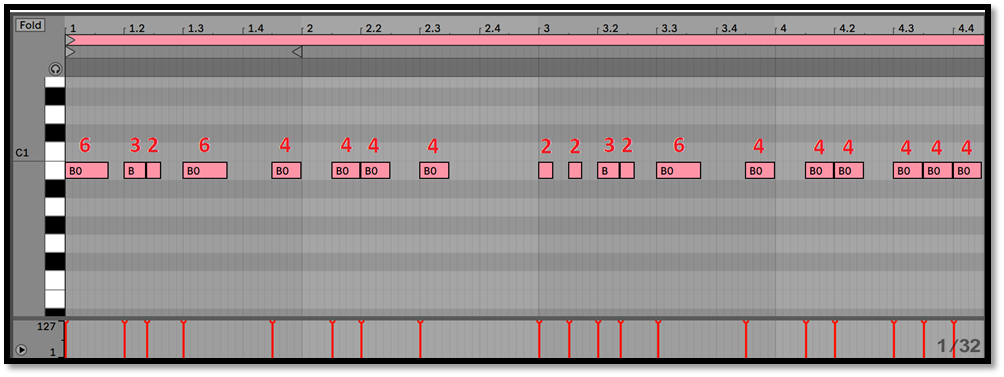
Add the icons in the Note Editor at B0, as in the picture below (after you add a note, use Shift+right arrow to lengthen the note). All of these icons are intended to start and finish on a grid line. Remember that you can zoom in your browser by pressing Ctrl+= a few times, and zoom out by pressing Ctrl+- a few times, and restore the normal zoom by pressing Ctrl+0:
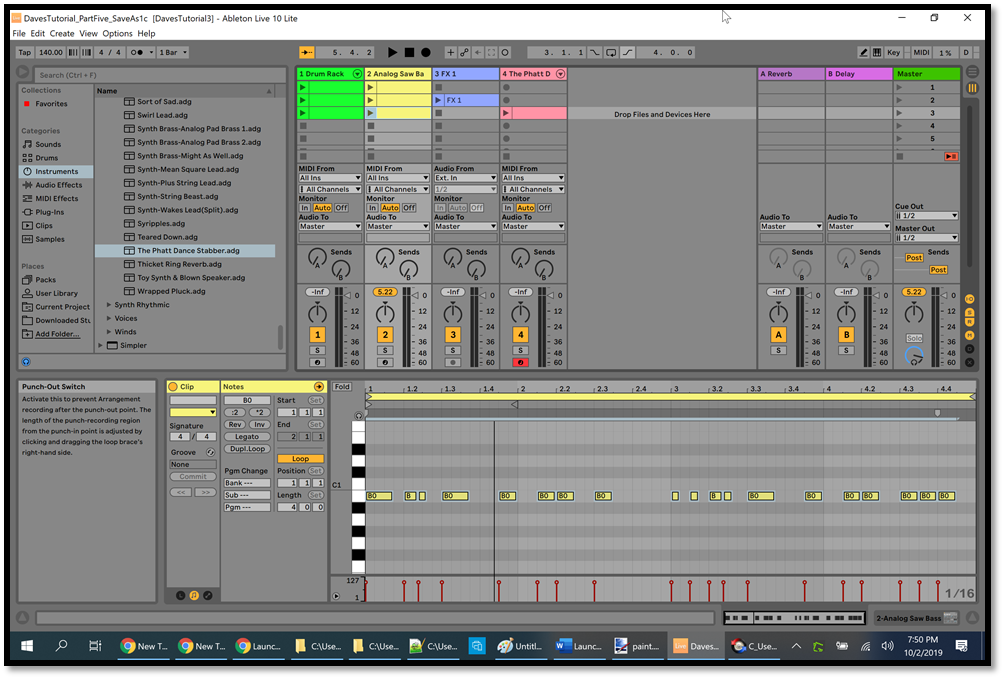
Now you've added a simple monotone melody to the song, so launch the clip in track #4 to listen to the melody. In a moment we'll make it sound more interesting, but first stop the clip and then let's create a simple bass line from this melody. Click anywhere in the Note Editor to give it the focus, then press Ctrl+A on your computer keyboard to highlight all of the icons, then press Ctrl+C to copy all of the icons. Double-click the third clip slot in track #2, then change the Length value to 4 and press Enter (like we did a moment ago), then click at the beginning of bar 1 in the Note Editor to give it the focus, then press Ctrl+V on your computer keyboard to paste all of the icons. Now you have a simple bass line (the yellow icons) which exactly matches the melody:
Now let's work on the first half of the melody. To do that, click the clip in track #4 to highlight it. Click at the beginning of bar 3 and drag to the left all the way past the beginning of bar 1 to draw a rectangle (don't let any of the note icons be inside of the rectangle):
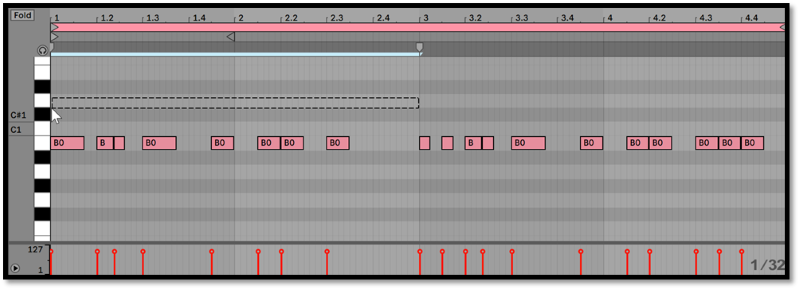
Release the mouse button, and then bar 1 and bar 2 will be highlighted. Right-click anywhere in the highlighted area (but not on a note icon), then click "Loop Selection":
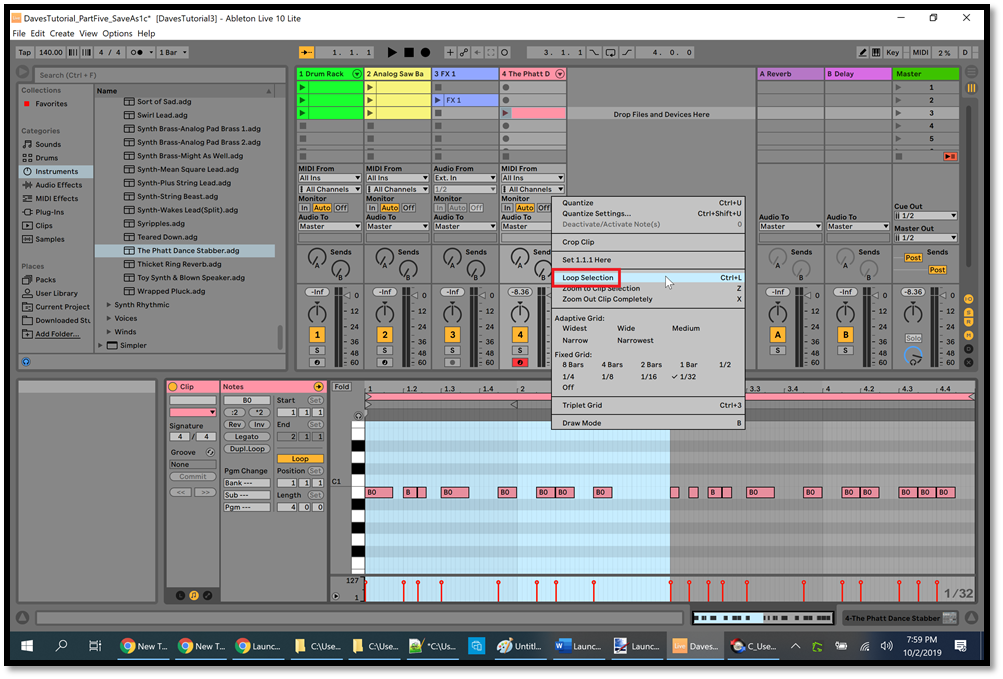
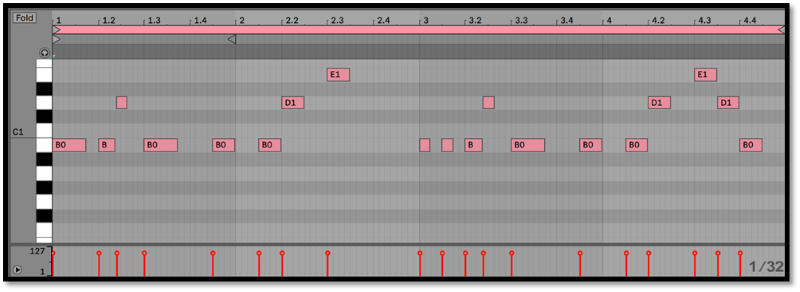
This will cause the first 2 bars to loop when you launch the clip, so that bar 3 and bar 4 won't be played. Launch the clip in track #4 and drag the note icons in bar 1 and bar 2 up or down to make a melody that you like. A simple way to do this is to click a note to highlight it, then use the up and down arrows on your computer keyboard to move the note. Here's an example (drag one note at a time and listen to how it changes the melody):

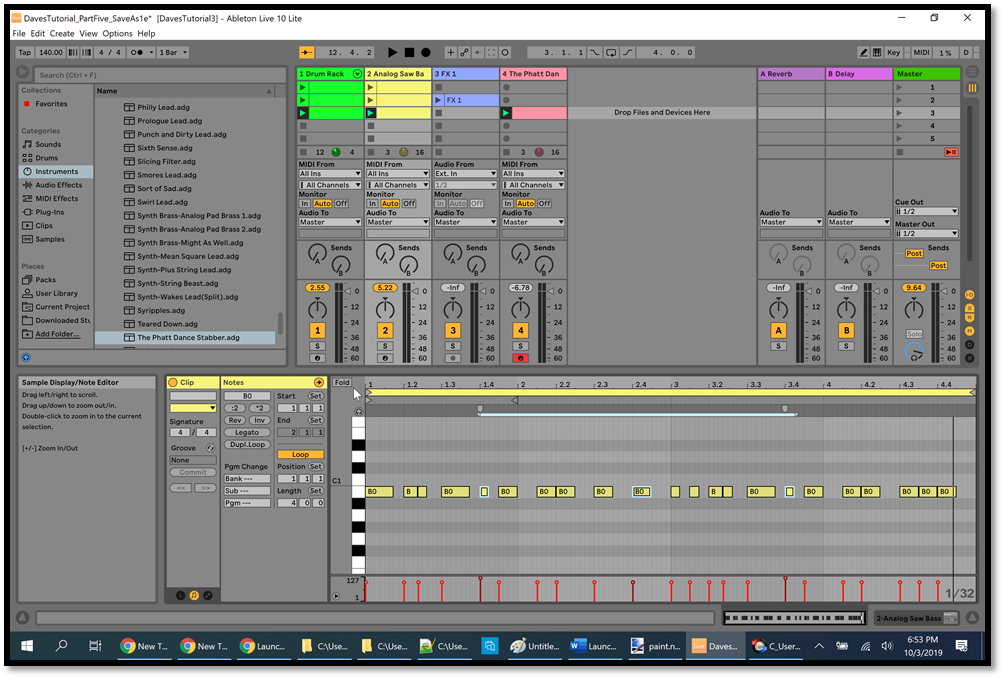
When you're finished with bar 1 and bar 2, stop the clip. Change the Length value to 4 and press Enter as we did a moment ago, to make the loop include all 4 bars. Launch the clip again, and work on bar 2 and bar 3 of the melody. You don't need to know any music theory at this point, because you can hear what sounds good. When you learn more about music theory then you'll have a better understanding of why certain notes sound good together, and you'll have more ideas for making good melodies and chord progressions and so on.
If you create a melody that you're happy with, click File/Save Live Set As and then type in a new filename to save what you've done so far. Then create the melody in the picture below in order to continue on in the tutorial:
Now let's play our song with what we've got so far. Click the first scene play button in the Master track and let it play for several bars, then click the second scene play button and let it play until the sound effect is fading out, then click the third scene play button.
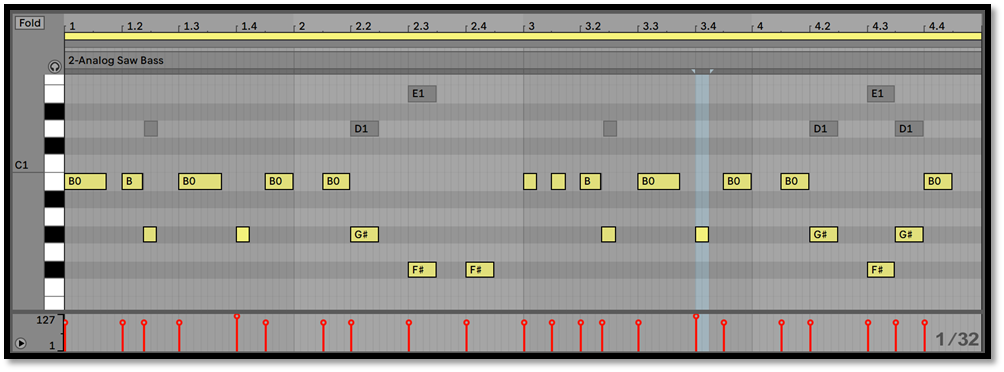
While the third scene is playing, click the third clip in track #2 to highlight it, then add the 3 notes which are highlighted in the picture below. This adds some extra fills to our bass line:
Stop the clips, and let's make the bass line a bit more interesting. To keep things simple, we'll turn the bass line into a mirror-image of the melody line. To do this, click the third clip in track #4 to highlight it, then hold down the Ctrl key and click the third clip in track #2 to highlight it. Now they're both highlighted, so they're both being displayed in the Note Editor. Every time the melody line (the gray icons in the picture below) goes up, make the corresponding bass note go down the same number of notes. Also make the extra fills in the bass line go down a bit, as in the picture below. Launch the third scene in the Master track to hear how it all sounds together:
While the song is playing, notice that it's clipping. In other words, the volume in the Master track is in the red. ===We'll fix this later.
In Part Six we'll continue working on our EDM song to learn more about the Ableton software. Click File/Save Live Set As and then type in a new filename to save what you've done so far.
Part Six
Modification History
-
September ===, 2019 - New page.
Dave Root
|