Cool Science Tricks


Home    Page 1    Page 2    Page 3    Page 4    Page 5    Page 6    Page 7    Page 8    Page 9    Page 10


Paper Helicopter

You've probably made paper airplanes before, but here's how to make a paper helicopter.

First cut a sheet of paper in half.
Fold one of the halves about a third of the way down.
Cut down the middle from the top until you reach the fold.

This creates two "wings."
Below the fold, come down a bit and then cut in from the sides so that you can fold the sides into thirds.

Fold the bottom up a little bit so that the sides stay folded in thirds.
Throw the bottom of the helicopter high into the air.

It will turn over in mid-air and come twirling back down!

Will it work better if the "wings" are longer?

Try making smaller helicopters. Do they work better?


Paper Wing

Ever wondered how an airplane is able to fly?

Here's how!

Hold a piece of paper by one end, and let the other end hang down.
Hold the paper near your mouth, but a little bit below your mouth.

Take a deep breath and blow hard over the top of the paper.

See how the paper rises into the air?

When a strong wind blows over the paper, it creates a vacuum above the paper which sucks the paper into the air.

In the same way, a strong wind blowing over an airplane wing creates a vacuum over the wing which sucks the airplane up into the air!


Flexagons

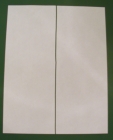
Here's an interesting thing to make!

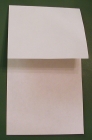
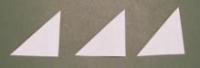
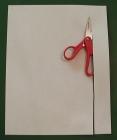
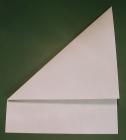
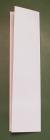
You need to start with a square piece of paper, which you can make by taking a sheet of paper and folding one corner over to the opposite side as in the picture.

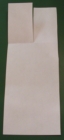
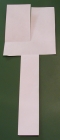
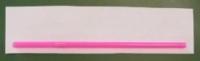
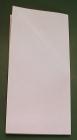
Carefully cut off the strip of paper below the triangle that you just created. Save this strip of paper for the Straw Rocket below!
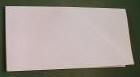
Open up the square piece of paper, then fold it in half.
Fold it in half again.
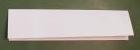
Open it up, then fold it in half the other way.
Fold it in half again.
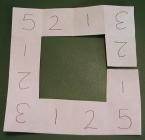
Cut out the 4 squares in the middle.

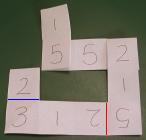
Write the numbers in each square as in the picture (some of the numbers will be upside down).

On the right-hand side of the picture, notice that the paper is cut between the 2 and the 1.
Turn the paper over and write the numbers in each square as in the picture.

In the bottom left corner there is a 6. Fold the paper to the right along the blue line so that the 6 in the corner is on top of the 6 next to it.

In the bottom right corner there is a 4. Fold the paper down along the red line so that the 4 in the corner is covered by the 4 above it.
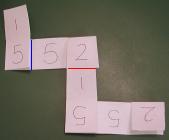
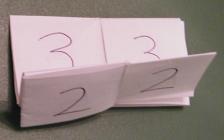
Now the bottom row has 3 1 2 5.

Fold down along the blue line so that the 2 is behind the 3.

Fold the bottom row to the right along the red line so that it goes behind the 5.
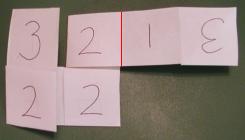
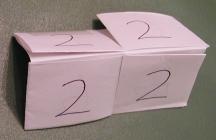
Fold to the right along the blue line so that the 5 on the left covers the 5 next to it.

Fold up along the red line so that the 1 goes behind the 2.
Fold to the left along the red line so that the 1 goes behind the 2, then tuck the end so that the 3 on the right (in the picture) is on top of the 3 on the left.
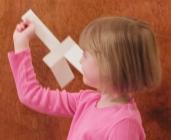
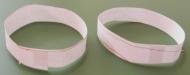
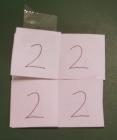
Place a piece of tape at the top of the 2 in the top left corner, then bend the tape behind the 2 so that it sticks to the 1 on the other side.

You have finished making your Flexagon!

Now you have a square piece of paper with two "faces." One face has the number 2 all over it, and the other face has the number 1 all over it. It's kind of like having dice with only the numbers 1 and 2. Normal dice have 6 faces, but this one only has 2 faces.

Or does it?
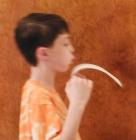
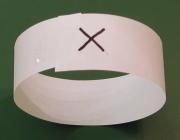
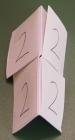
With the "2" face in front of you (and the "1" face on the other side), bend the Flexagon in the middle as in the picture.
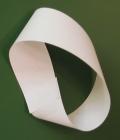
When you bend it all the way back, it will open up at the crease.

Where did the "3" face come from?
Turn the Flexagon over so that you're looking at the "2" face again, then "flex" it just like you did above. You should be looking at the "1" face. Turn it over so that you're looking at the "2" face again.

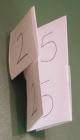
Now bend the "2" face in the middle the other way (as in the picture).
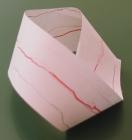
Open it at the crease.

Where did the "5" face come from?

This Flexagon actually has 6 faces, just like regular dice! Can you find the "6" face by flexing the Flexagon in different ways?

The prefix "tetra" means "four," and the prefix "hexa" means "six." Since this is a 6-faced, 4-sided Flexagon, it is called a HexaTetraFlexagon. There are lots of other Flexagons you can make (such as DodecaHexaFlexagons, which have 12 faces and 6 sides!), and you can find them by searching the Internet for "flexagon".
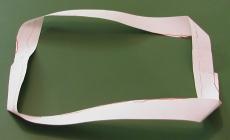
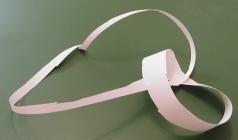
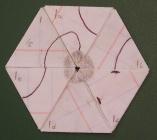
Years ago I invented a "FlexaMaze" in which you must follow a line from the Start to the Finish through all of the faces.

I used a HexaHexaFlexagon (6 faces and 6 sides), as shown in the picture. I submitted it to Games Magazine years ago, but I have no idea if they ever published it.

See if you can make your own FlexaMaze!


Straw Rocket

Here's a fun thing that we recently invented!

Take the paper strip from step 1 of the Flexagons (above), or cut out a new strip of paper about 2 1/2 inches high and 8 1/2 inches wide.

Roll the paper around a straw, but not too tightly.
Flatten one end of your paper tube, then fold a piece of tape over it.

Slide the paper tube onto the straw, then blow your Straw Rocket across the room!

Make sure that you won't hit any people or any breakable objects!
Notice that the Straw Rocket flies a short way and then starts to tumble in the air.

To fix this, cut out 3 small triangles.
Carefully tape the small triangles to the end of your Straw Rocket near where the straw slides into it.

Now your Straw Rocket will fly a lot farther and straighter!

When you see pictures of real missiles and rockets, now you know why they have those fins on them!

Try some experiments:
  • Does a shorter Straw Rocket fly better than a longer one?
  • Does it make a difference if you have only 1 or 2 fins, or if you have more than 3 fins?
  • Who can shoot their Straw Rocket the farthest?
  • Who has better aim shooting their Straw Rocket at a target?
  • Can you tape a Straw Rocket to the bottom of a paper airplane and launch the airplane with the straw?
  • Will it work if you simply tape a wing (such as a triangular piece of paper) onto the Straw Rocket?
Have fun, but be safe!


Mobius Strip

Carefully cut out a thin strip of paper.

Then cut two more similar strips.
Make a circle with one of the strips, then tape the ends together.
On the outside of the circular strip of paper, draw a red line in the middle all the way around the circle (or use some other color).

Notice that the circular strip has two sides. It has an "outside" (with a line drawn around it) and an "inside" (with no line drawn on it).

Draw a black line all the way around the circle near one edge. Notice that the circular strip has two edges (one with a black line near it, and one with no black line near it).
Carefully cut all the way around the middle of the circular strip (where the red line is in the pictures).

Notice that you end up with two circular strips.
With another strip of paper, make a circle again but don't tape it yet.

Imagine that one end of the paper has an X on the outside.

Twist that end over so that the imaginary X is facing downwards, then tape it to the other end.
Now you have a circular strip with a twist in it.

This is called a "Mobius Strip."
Draw a red line in the middle all the way around the Mobius Strip (or use some other color), just like you did with the circular strip.

Notice that the Mobius Strip only has one side! It doesn't have an "inside" and an "outside" like the circular strip does!

How is that possible?

If you draw a black line all the way around the Mobius Strip near one edge, you'll see that the Mobius Strip only has one edge!

How is that possible?
Carefully cut all the way around the middle of the Mobius Strip (along the red line in the picture), just like you did with the circular strip.

Notice that it makes one large twisted circular strip instead of two circular strips!
With the third strip of paper that you cut out in step 1, make another Mobius Strip.

This time, cut all the way around the Mobius Strip near the edge (where the black line is in the pictures above).

Notice that this time you end up with two linked loops!

Weird!


Home    Page 1    Page 2    Page 3    Page 4    Page 5    Page 6    Page 7    Page 8    Page 9    Page 10


"Cool Science Tricks"
URL: http://daveroot.neocities.org/sciencetricks/Page8.htm

Modification History
01/18/2006: New page.


Dave Root

email: dave.root@live.com
home page:   http://daveroot.neocities.org